Setting Up Raspbian Jessie on the Raspberry Pi 3 B
Overview
Thanks to the free trial of Amazon Prime,
I bought a Raspberry Pi 3 B!
To get it ready for development,
I’ve put together this setup guide.
Environment
- MacBook Pro : MacOSX 10.11.5
- Wifi environment
What I Bought
Here are the bare essentials.
Total: 8,459 yen
- Raspberry Pi 3 Model B (with case): 5,980 yen
- SD card (32GB) : 1,080 yen
- Power supply (2.5A compatible): 1,399 yen
I had thought a PC’s USB port might be enough for power,
but since the Pi 3 B’s recommended current is 2.5 A, a 2.5 A capable power supply became necessary.
Other items
You probably already have most of these on hand.
They’re probably tossed somewhere in the junk pile at your office.
- HDMI cable : 691 yen
- USB keyboard : 530 yen
- USB mouse : 698 yen
Even with the extras, it comes to 10,378 yen. Well, there’s no turning back now.
Let’s get right into the setup steps.
Formatting the SD Card
Installing the SD Card Formatter App
Download the SD card formatter app from the site below and format the card.
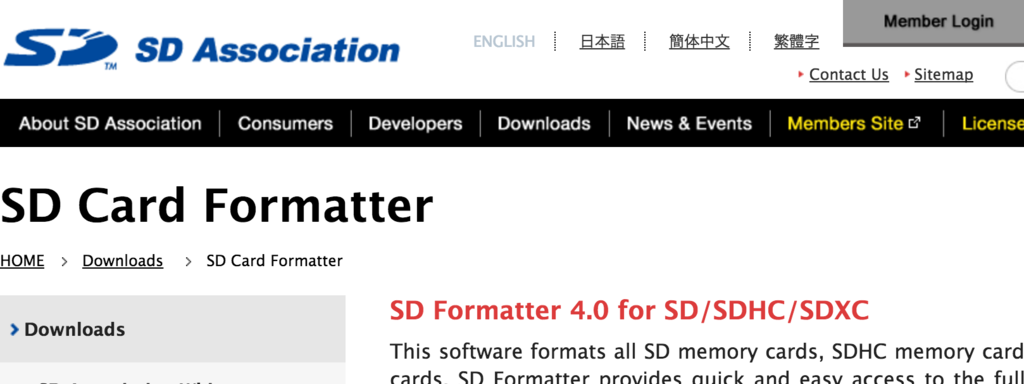
On a Mac, select for Mac,
accept the agreement, and download.

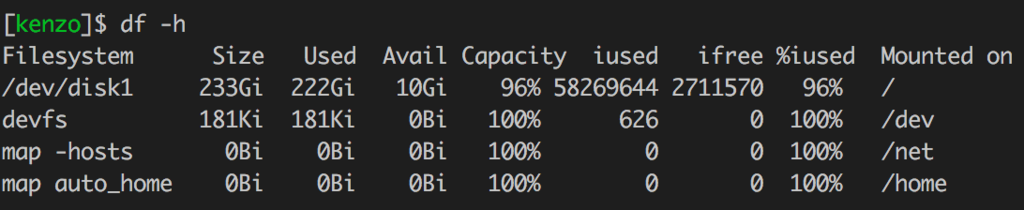
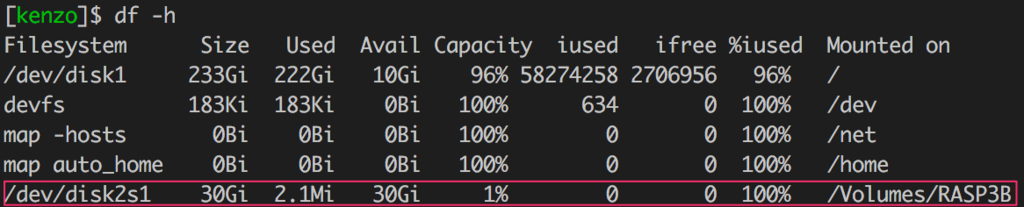
Checking the File System
Since you need to know which SD card to format,
run the following from the terminal before inserting the SD card.
1 | df -h |
Insert the SD Card into the Mac
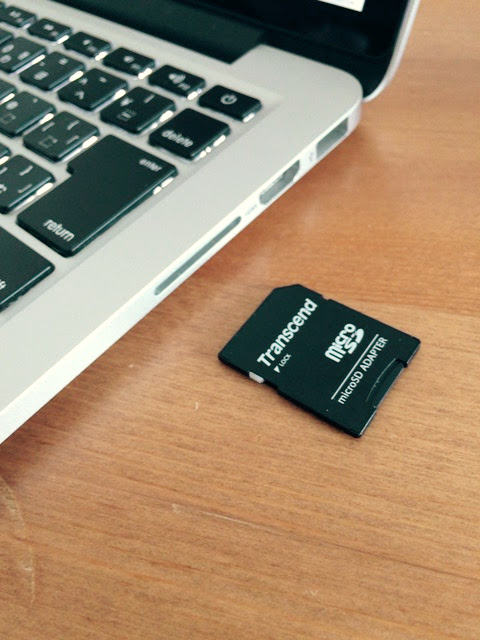
- The MacBook Air has no SD card slot, so you’ll need a card reader to read it.
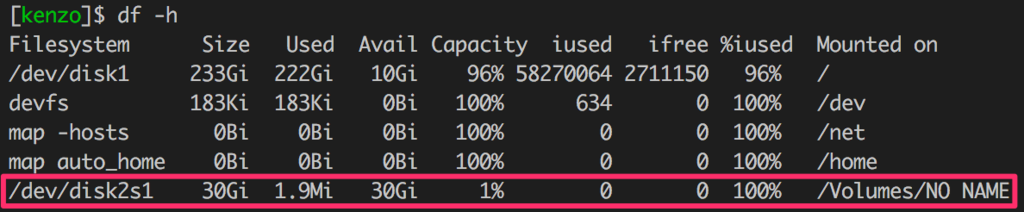
Run df -h again, and
the newly added entry is the SD card’s file system.
Formatting with SDFormatter
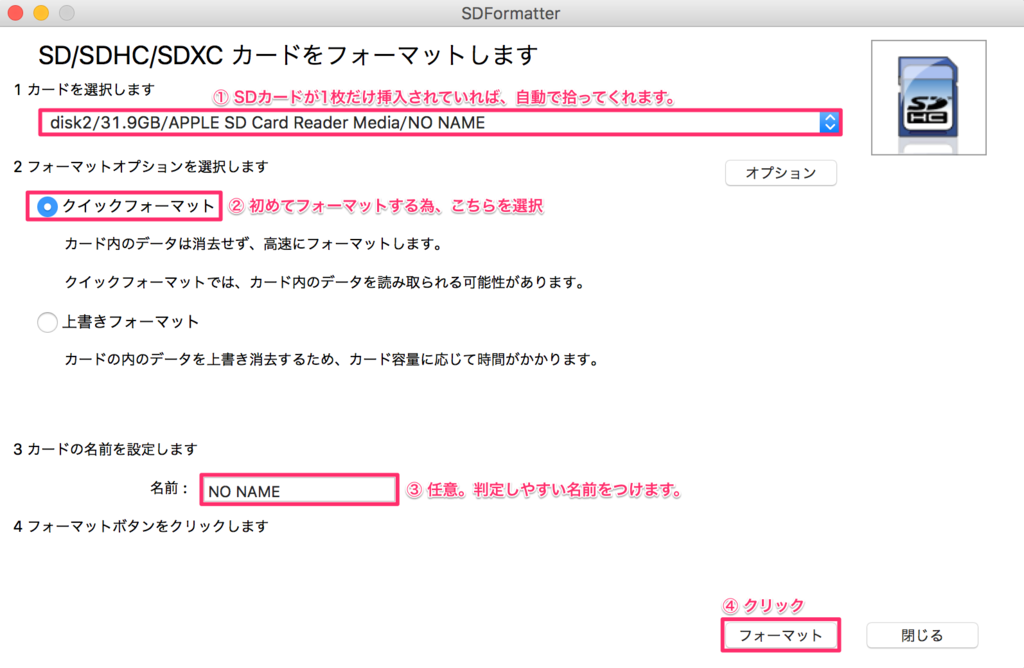
- I named mine “RASP3B”.
Run df -h once more.
You can see that the disk image name has changed.
That completes formatting the SD card.
Writing Raspbian Jessie (Latest OS) to the Disk Image
Downloading Raspbian Jessie
Install the latest Raspbian OS from the official site.
This takes a few minutes.
1 | cd ~/Downloads |
Unmounting
Unmount the target image by taking the file system name /dev/disk2s1 you checked earlier and removing the s1.
1 | diskutil umountDisk /dev/disk2 |
Writing the Downloaded Image
1 | sudo dd if=/Users/<User>/Downloads/2016-05-27-raspbian-jessie.img of=/dev/rdisk2 bs=1m |
- Adding an
rprefix todisk2runs in unbuffered mode for a speed boost. - bs=1m … the size written at a time
It took 257 seconds. Phew.
That’s how I created the SD card to insert into the Raspberry Pi.
Ejecting the SD Card
1 | $ diskutil eject /dev/disk2 |
Connecting Everything to the Raspberry Pi 3
Do not supply power to the Raspberry Pi until everything is connected.
Inserting the SD Card
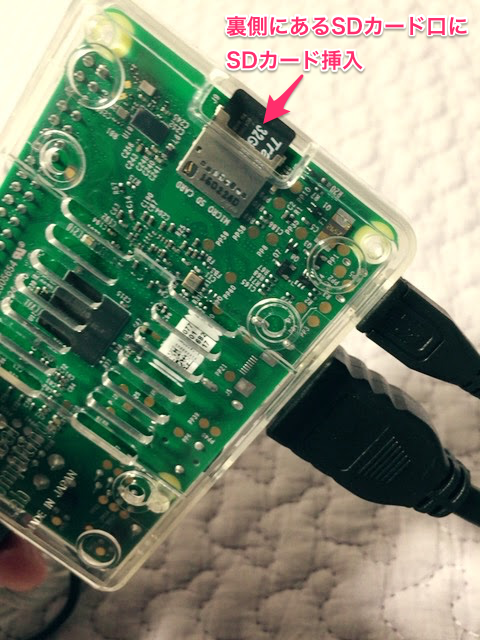
Connecting the USB Keyboard/Mouse, SD Card, and Power
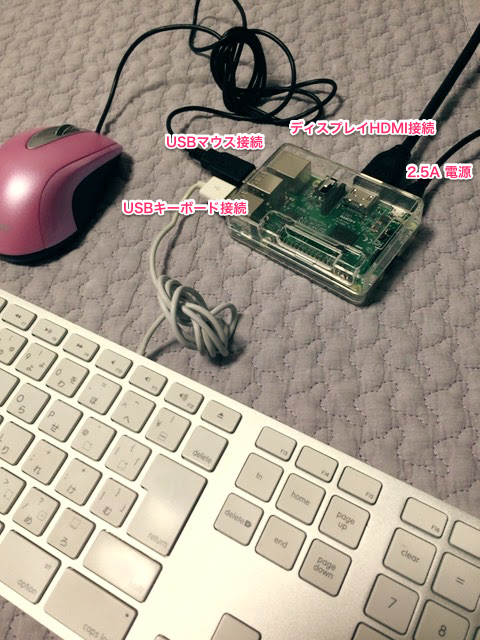
After confirming everything is firmly plugged in,
it’s finally time to connect the power adapter.
It’s on!
Something started loading!
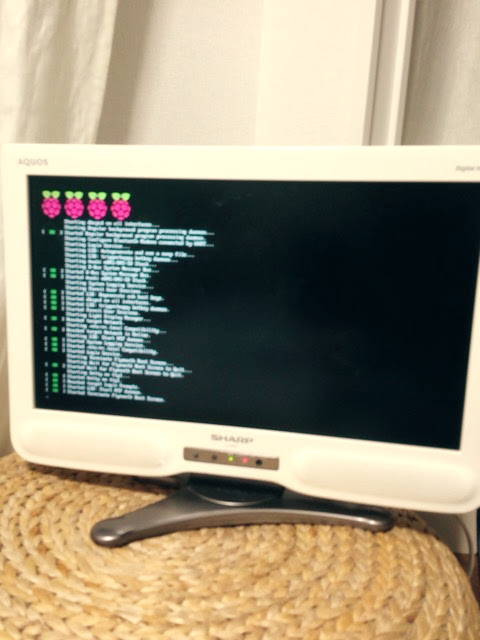
- In my home, the TV doubles as a display.
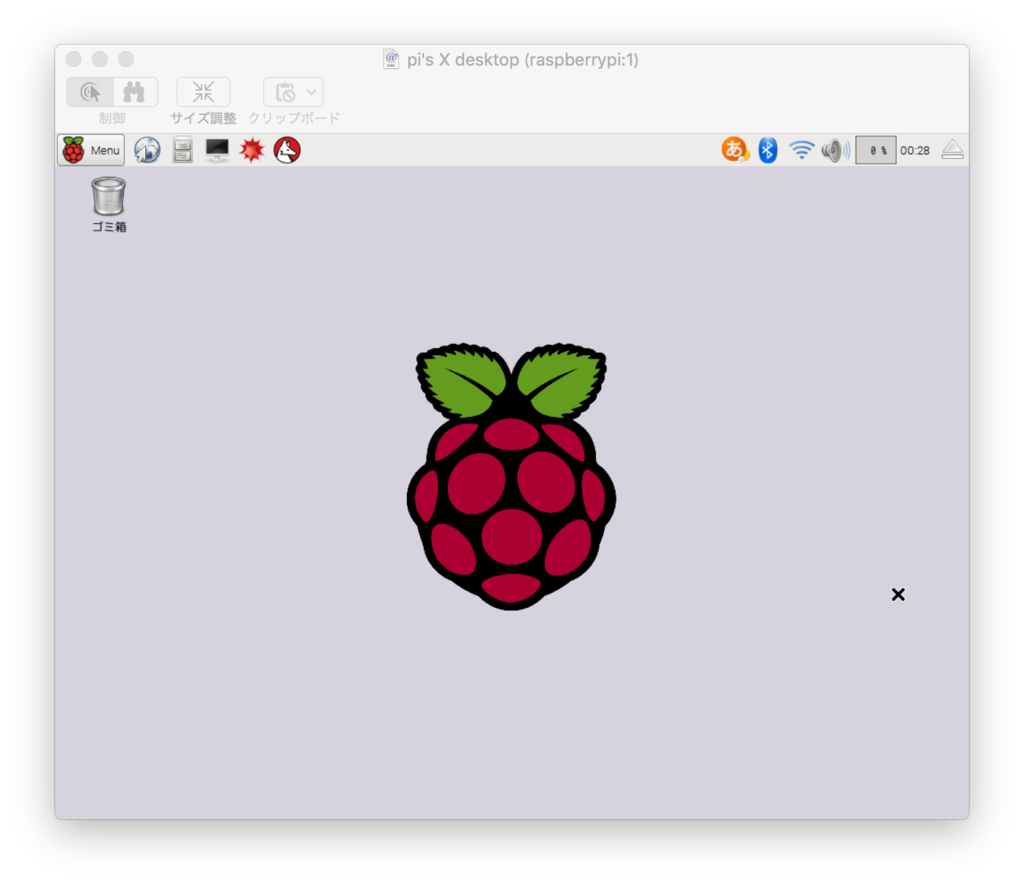
Oh wow, the GUI home screen came up!
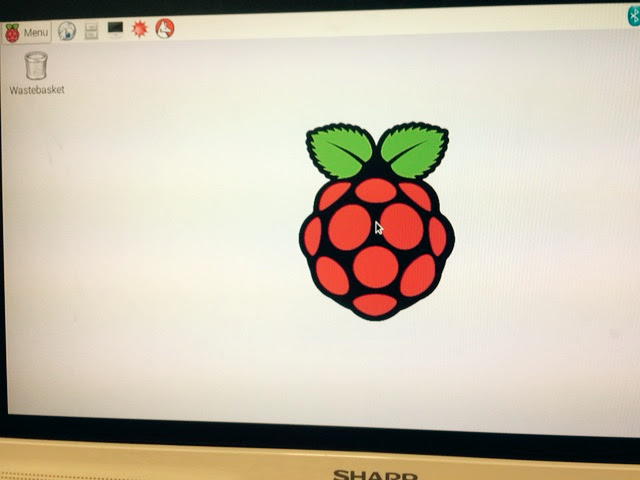
Success, for starters!
Configuring the Raspberry Pi
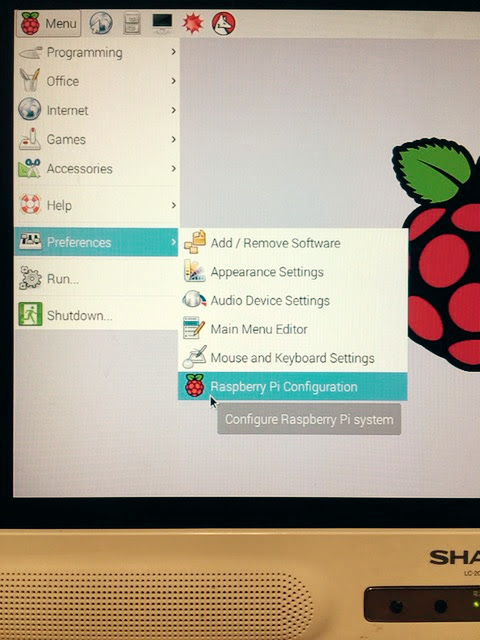
Making the Full SD Card Capacity Available
- Click the
Expand Filesystembutton on theSystemtab.
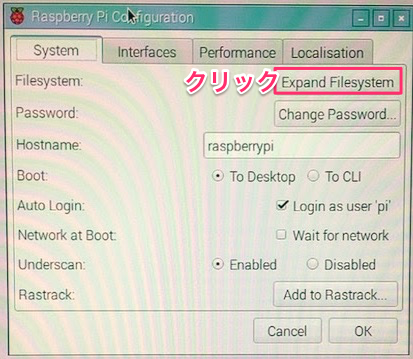
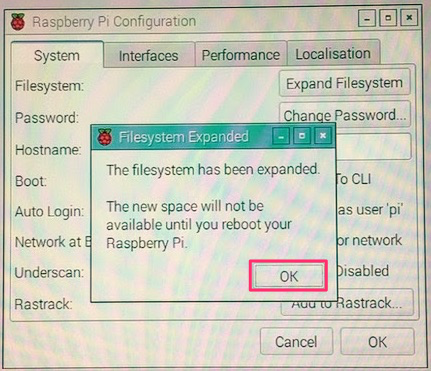
This makes the full capacity of the SD card available.
Locale Settings
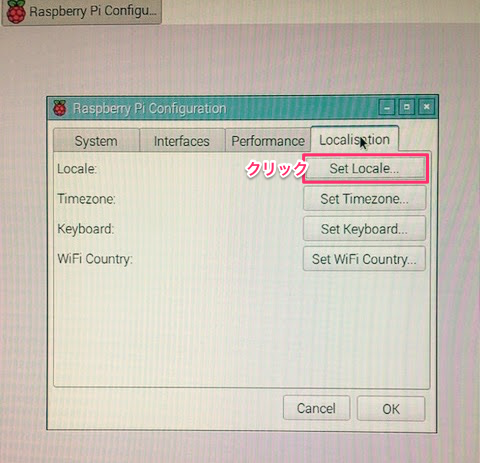
- Click the
Set Localebutton on theLocalisationtab.
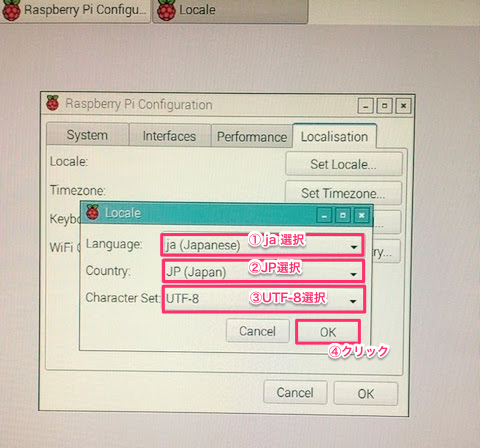
Language: select ja (Japanese)Country: select JP (Japan)Character Set: select UTF-8
Make the selections above and click the OK button.
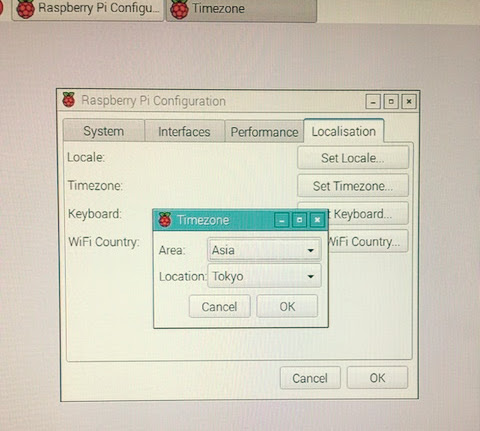
Timezone Settings
Localisationtab > click theSet Timezonebutton
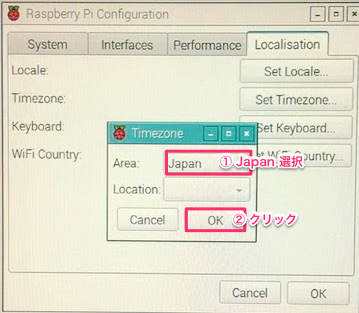
When you click the Set Timezone button again, Asia/Tokyo is already selected.
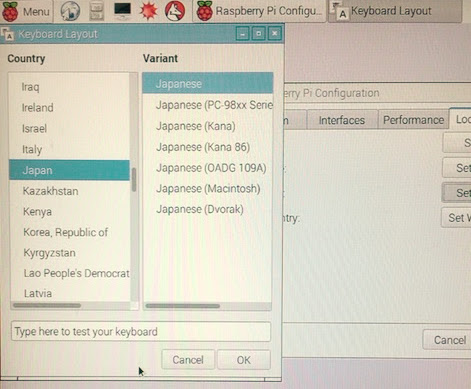
Keyboard Settings
Click the
Set Keyboardbutton on theLocalisationtab.Country: selectJapanVariant: selectJapanese
Make the selections above and click the OK button.
Wifi Settings
- Select the Wifi network, enter the passphrase, and connect to Wifi.
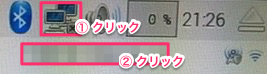
- You can confirm the Wifi connection.

SSH Connection from macOS to the Raspberry Pi
- Launch Terminal on the Raspberry Pi.
1 | ifconfig |
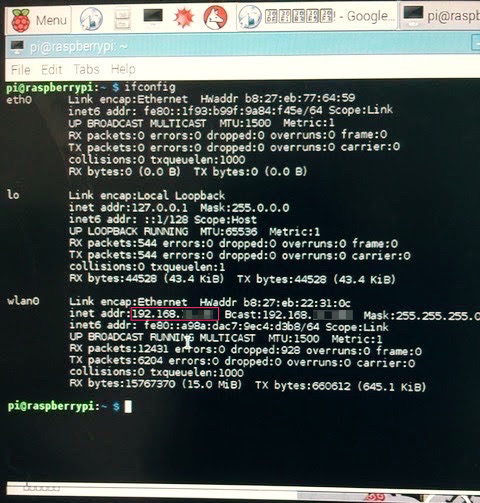
- SSH into the Raspberry Pi from the Mac.
1 | [MacOSX local]$ ssh pi@192.168.xxx.xxx |
The SSH login was confirmed!
Addendum (2016-07-08)
I realized afterward that
instead of going to the trouble of photographing the screen with my iPhone,
I should have just used Remote Desktop to grab clean screenshots…
So,
while I was at it with SSH, I installed tightvncserver, which provides Remote Desktop functionality.
1 | $ sudo apt-get install tightvncserver |
- Specify the hostname you configured to Remote Desktop in and share the screen.
1 | vnc://raspberrypi.local:5901 |
Opening a Browser
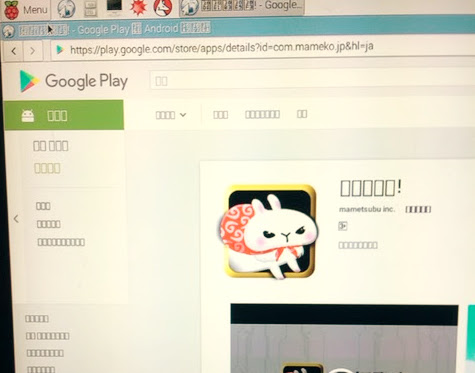
You can see it’s connected to the internet.
However,
every bit of Japanese text shows up as tofu (mojibake boxes)…
I ran into the same kind of issue before with Zabbix when the Japanese fonts were missing…
I need to install Japanese fonts.
Installing Japanese Fonts on the Raspberry Pi
1 | sudo apt-get update |
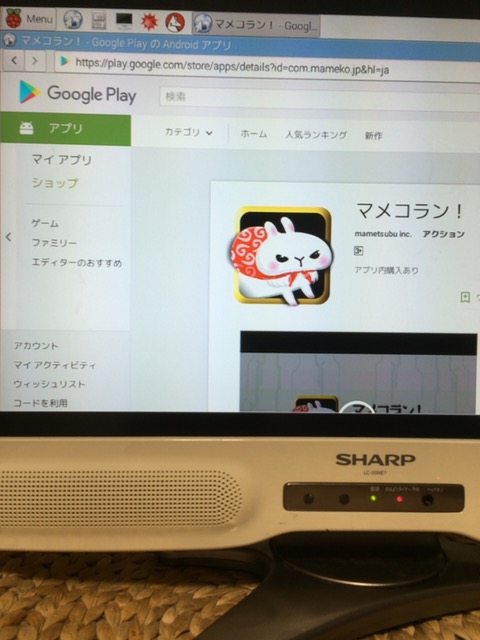
Opening the Browser Again
- Japanese text is now displayed correctly.
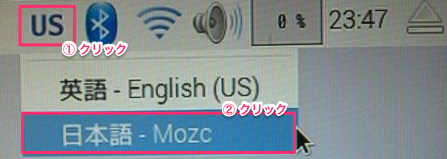
- To enable Japanese input, select
日本語 - Mozc.
That completes the setup.
Thank you for reading.